


Birds, Roses, and Gold: A Sweet Keepsake Box DIY
Can a plain cardboard gift box become a beautiful vintage-style keepsake?
In this tutorial, Donna from Mason Creations etc. turns a simple Dollar Tree cardboard box into a sweet shabby chic treasure with roses, birds, script paper, pearly shimmer, gold edges, and soft aged details.
This project is a lovely way to dress up a small gift box, create pretty storage for keepsakes, or make handmade packaging that feels like part of the gift itself.
Watch the video below to see Donna create the full keepsake box, then follow the steps to make your own.
Shop the Key Products
Tap any item to shop this project.
 Polyvine Heavy Duty Varnish
 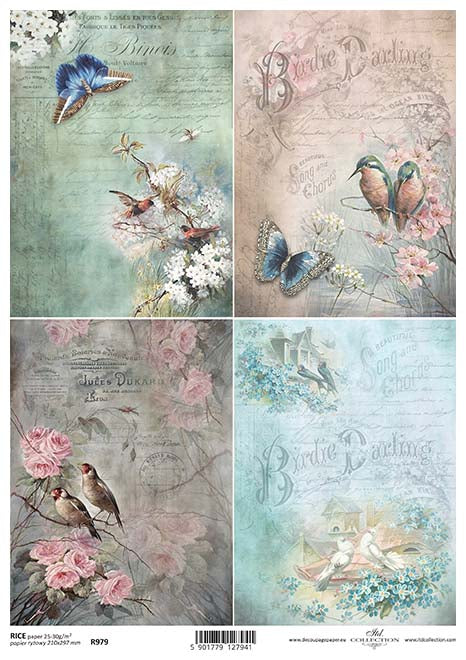 Butterflies and Birds Rice Paper
  Dixie Belle Chalk Mineral Paint
  Floral Element
Materials You Can Shop Here
You can shop the featured finishes and supplies below, then use the tutorial steps to bring the project together.
- Polyvine Heavy Duty Varnish
- Butterflies and Birds Rice Paper
- Roses Rice Paper
- Vintage Script Rice Paper
- Dixie Belle Chalk Mineral Paint
- Dixie Belle Glaze
- Pentart Acrylic Paint
- Floral Element
- Adhesives
- Metallic Wax Rub
- Brushes & Tools
Also Needed
Cardboard box, tassel.
Step 1: Paint the Box White
Start with a plain cardboard gift box.
Paint the entire box and lid, inside and outside, with Dixie Belle Chalk Mineral Paint in Cotton.
A white background is important under rice paper because it keeps the printed colors bright and vibrant. Dark paint underneath can show through the paper and make the design look dull.
Let the paint dry before decoupaging.
Step 2: Choose Your Rice Papers
Donna uses three different rice papers for this project:
One paper with wood planks and pink roses for the sides of the bottom portion of the box.
One antique script paper for the edges around the lid.
One floral bird image for the top of the lid.
Using coordinating papers gives the box a layered, collected look while keeping the colors soft and cohesive.
Step 3: Measure and Cut the Side Paper
Measure the rice paper for the sides of the bottom box.
Cut the paper slightly larger than needed so you can trim it cleanly after it dries. Donna marks the paper on the back side so any small slip will not show on the finished design.
Step 4: Decoupage the Bottom of the Box
Use Polyvine Heavy Duty Varnish as the decoupage adhesive.
Start at one corner of the box and wrap the rice paper around the sides. Brush varnish onto the cardboard, press the paper into place, and brush another layer of varnish over the top.
Continue around the box, gluing as you go.
When piecing paper together, Donna cuts along one of the printed board lines so the seam disappears into the plank design.
Step 5: Add Rice Paper to the Lid Edges
Cut strips of antique script rice paper slightly larger than the lid edges.
Brush varnish onto one edge of the lid, position the paper strip, then brush more varnish over the top.
Repeat around all four sides, lining up the lettering as you add each new piece.
Place the lid and box over bottles to dry so the excess paper hanging over the edges does not get damaged.
Let everything dry for a couple of hours.
Step 6: Sand Away the Excess Paper
Once the rice paper is dry, remove the extra paper from the edges with medium-grit sandpaper.
Run the sandpaper downward over the edge of the box. Do not sand upward, because that can lift the rice paper.
This technique cuts the paper neatly and leaves a clean, finished edge.
Step 7: Fix Warping in the Cardboard
Cardboard can warp when it absorbs moisture from paint and varnish.
Donna fixes this by spraying the box lightly inside and outside with water, putting the lid on, and letting it dry overnight.
This helps the box settle back into shape.
Step 8: Add the Top Image
Choose the image for the lid and position it carefully.
Donna uses a pretty floral image with pink roses and birds. She test fits the image on the lid, marks the placement, folds it, and cuts it to size.
For this part, she uses a sharp cut edge instead of a torn edge because the image needs to fit the lid top precisely.
Step 9: Decoupage the Lid Top
Brush Polyvine Heavy Duty Varnish onto the lid and press the rice paper image into place.
Add another coat of varnish over the top of the paper.
To smooth the image, mist a piece of plastic storage bag with water, lay it over the wet paper, and press out bubbles or wrinkles with a dry paper towel. Lift the plastic carefully so the paper stays in place.
Step 10: Seal the Decoupage
Brush another coat of varnish over all the decoupaged areas.
Pay close attention to the sanded edges so they are sealed and protected.
Let the varnish dry for about one hour.
Step 11: Add Pearly Shimmer Inside
Brush Dixie Belle Pearlescent Glaze inside the box and lid.
This gives the interior a soft, pearly satin appearance and makes the inside feel finished and special.
Let the glaze dry for about 30 minutes, then seal the inside of the box and lid with varnish.
Step 12: Add Gold Edges
Use Pentart Delicate Gold Paint and a small sponge stippler to add gold to the edges and corners.
Dip the flat side of the sponge lightly into the gold paint. Run the flat side along the edge without pressing down.
This adds a pretty gilded detail without smearing paint across the flat surfaces.
Let the gold paint dry for about 30 minutes.
Step 13: Apply a Final Protective Coat
Brush on a final coat of varnish to protect the painted and decoupaged surfaces.
Let it dry for about one hour.
Step 14: Age the Inside Corners
Use Finnabair Metallic Wax in Bronze Age to add a soft aged effect inside the box and lid.
Donna places a small amount on a paper towel, picks up a little with a brush, and rubs it into the corners.
Because the surface is varnished, any excess wax can be wiped away.
Wax rubs do not need sealing, so they should be one of the final products added.
Step 15: Add the Finishing Touches
Glue a pink tassel to the top of the lid.
Donna places the tassel slightly off center because the string is short, then centers a pale pink rose over it.
These final details coordinate beautifully with the pink rose rice papers and turn the box into a sweet keepsake piece.
A Pretty Box for Gifts, Keepsakes, or Display
This project is a beautiful reminder that even a simple cardboard box can become something special with paint, rice paper, varnish, and a few thoughtful embellishments.
The white base keeps the papers bright, the gold edging gives the box a boutique feel, and the pearly interior makes it just as pretty inside as it is outside.
A special thank-you to Donna from Mason Creations etc. for sharing this lovely shabby chic project and showing each step so clearly.
Stay Connected
Before you go, be sure to subscribe to our newsletter. You'll receive 10% off your next order, along with early access to new arrivals, restocks, seasonal projects, and special offers just for subscribers. We love crafting alongside you and can't wait to see what you create next.